
So why is brining so great and what's the best way to do it? We have you covered with easy tips and all the info you need to ensure a juicy Thanksgiving turkey.
Why Brine?
As the holidays approach, you may hear that you should brine your bird to make it more tender and juicy. Savory Spice co-founder, Mike Johnston wrote a helpful Brining 101 article about the benefits of brining. Check out the article for the full science behind brining, but here are the highlights.
- Brining makes your protein juicy: When your bird spends time in a liquid solution with salt, sugar, and seasoning, it's infused with moisture and flavor.
- Brining takes less time than you think: You need to brine for one hour per pound. For a turkey, that’s an easy overnight process.
- Brining isn't the same as using a marinade (or a rub): A marinade or rub will only impact the flavor and texture of the outside of the protein. Brining is a longer process that allows the solution to be absorbed inside the meat.
How to Brine
Brining may sound intimidating but we're here to break it down for you. A brine is simply a liquid solution of salt, sugar, and seasoning. If you're already comfortable with brining, you can always customize your brine by adding spices, swapping out some of the water for other liquids, or even making your own brining solution.
If you want an easy way to brine, Savory Spice’s Turkey Brining Kit has you covered. We've included the directions below, with some visuals in case you find them helpful.
Step 1 - Be Prepared!
Find a large, food-safe container with enough room to hold a 12-15 lb. turkey. The turkey should be able to be completely submerged in liquid. Usually a very large stockpot will work.
In a pinch, if you're out of freezer space, you can stash your sealed brining bag and bird in a cooler with ice. Just make sure you periodically check the temperature to make sure your meat stays in the safe zone.

Step 2 - Stir it Up
In a large pan, add the Brining Mix to about 1 gallon of water. Bring to a simmer and stir, making sure all of the salt and sugar are fully dissolved in the water. Remove from heat and let cool to room temperature.
If you are adding other spices or flavorings (like citrus zest, additional garlic, or herbs), now is the perfect time to do that.
Step 3 - Cold Water
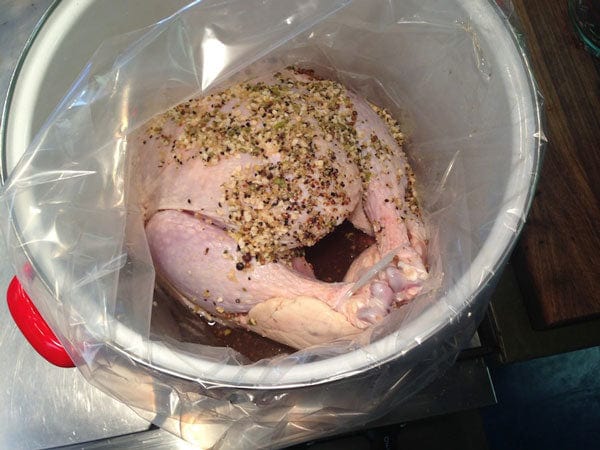
Pro-Tip: A brining bag keeps the liquid contained and makes for an easy clean-up. But you might need an extra set of hands to help tie up the bag.
First, put the brining bag into the container. Then, place your thawed 12-15 lb. turkey in the bag. Pour the cooled liquid brine over the turkey then top it with enough water to completely submerge the turkey. This will be about 1½ to 2 gallons, depending on the size of the turkey and the container.
You can substitute part of the water for other liquids that will add flavor (beer, juice, or broth). Don't substitute all of the water because that can alter the flavor and texture of the finished bird. A good rule of thumb is to swap no more than 1/4 of the water for another liquid. Add that liquid first, then finish with enough water to cover the turkey.
Step 4 - Let it Brine
Secure the brining bag closed. Make space in the refrigerator for your large container, and refrigerate the turkey in the brine for about 1 hour per lb. of turkey.
Pro Tip: For a standard 12-15 lb. turkey, it will be best to start this in the early evening the night before you're planning to cook your turkey.
For example, if you need to start cooking your 15 lb. turkey at 10am, you'll want to have your bird in the fridge by 7 pm the night before.

Step 5 - Shake it Off
Ok, don't actually shake your bird, but it is time to dry out your bird before you cook it. After the brining time is up, remove the turkey from the brining liquid. Discard the liquid and the brining bag. Rinse the turkey (this step is important to prevent your bird from being too salty once it's cooked) and pat dry to remove all excess liquid.
Tip: For extra crispy skin, after following the steps above, place the turkey on a roasting pan and set it back in the refrigerator, uncovered, for at least an hour before cooking to let the skin dry out a bit more.

Step 6 - There's the Rub
This is the best part! Just before you're ready to roast, fry, grill, or smoke your turkey, generously rub it with your favorite seasoning. We're going to recommend our classic Holiday Roast Turkey for traditional flavor, but get creative with your favorite rub or seasoning.
Top Picks for Turkey
Some of our favorite rubs for turkey are:
We suggest using about 1 tsp. seasoning per pound of poultry, or more to taste. That's probably less than you typically use but remember that the bird has absorbed some of the salty brine, so go easy on the salt! Generously rub the seasoning on the outside of the poultry skin, and/or underneath the skin before cooking. Use olive oil or melted butter, if desired, to help the seasoning stick.Brining FAQs
Here are some of the questions our testers asked when trying the new Turkey Brining Kit. We hope you find these answers helpful.
What if I have a turkey that’s smaller or larger than 12 lb., can I still use the kit?
Yes, you can!
- For a turkey that’s smaller than 12 lb. (or if you spatchcock the turkey or cut it into pieces before brining) you’ll need less liquid to submerge the turkey, meaning you’ll need less brining mix as well. Use 8 oz. of the mix for each 1 gallon of brining liquid you need.
- For a turkey larger than 15 lb., you may need more liquid to submerge the turkey, and more brining mix so the flavor (& juicy factor) isn't diluted. You can purchase an additional package of Brining Mix, and combine that with the kit to make more brining liquid for a larger bird.
Can I use the mix to brine other protein?
Absolutely!
Even though we call it a Turkey Brining Kit, brining is not just for turkeys! You can absolutely use it to brine other types of protein you may be cooking up - anything from chicken pieces to pork chops. Simply determine how much liquid will be needed to submerge the protein and measure out how much mix you’ll need from there. The easiest way to do this is to grab your brining container, put your meat in, add water to fill up the container, then measure that water into a sauce pan. That will give you a measurement of how many quarts or gallons of liquid brine you will need.
Here are some simple guidelines:
- Use about 1½ cups per gallon of liquid. This is best for smaller poultry like a whole chicken.
- Use about 3/4 heaping cup for ½ gallon (2 quarts) liquid. This is best for smaller poultry pieces, pork roast, pork chops.

For more information about brining any type of protein, read our Brining 101 article. We have tips, tricks, and basic ratios of liquid, salt, sugar, and seasonings to create your own brine.
What types of things do you brine? Share your brining successes by tagging us with @savoryspiceshop on Instagram